This barrel cactus arrived with five pups. The choices are to plant it as is, or to remove the pups and start them on their own. We decided to remove all five pups and start them as separate plants.

To state the obvious, cacti require special handling. Here's the array of tools set out, and although we didn't use all of them they were ready just in case. Old tongs and a variety of scrapers, chisels, knives and screwdrivers. Leather gloves are a must have. The tools should be clean.

There's one important tool missing from this lineup and that's an empty plastic pot to hold the mama plant while the pups are removed. It's important to find something you can grip and avoid the spines.

All ready to go and Mr. Rock-Oak-Deer starts with the old tongs and a scraper to remove the first one. One twist and a pull and it's separated so he discards the scraper and works with the tongs for the rest.

A slight twist with the tongs and they just pop right off. This action leaves small round scars on the larger plant.

Now he's working his way around the cactus.

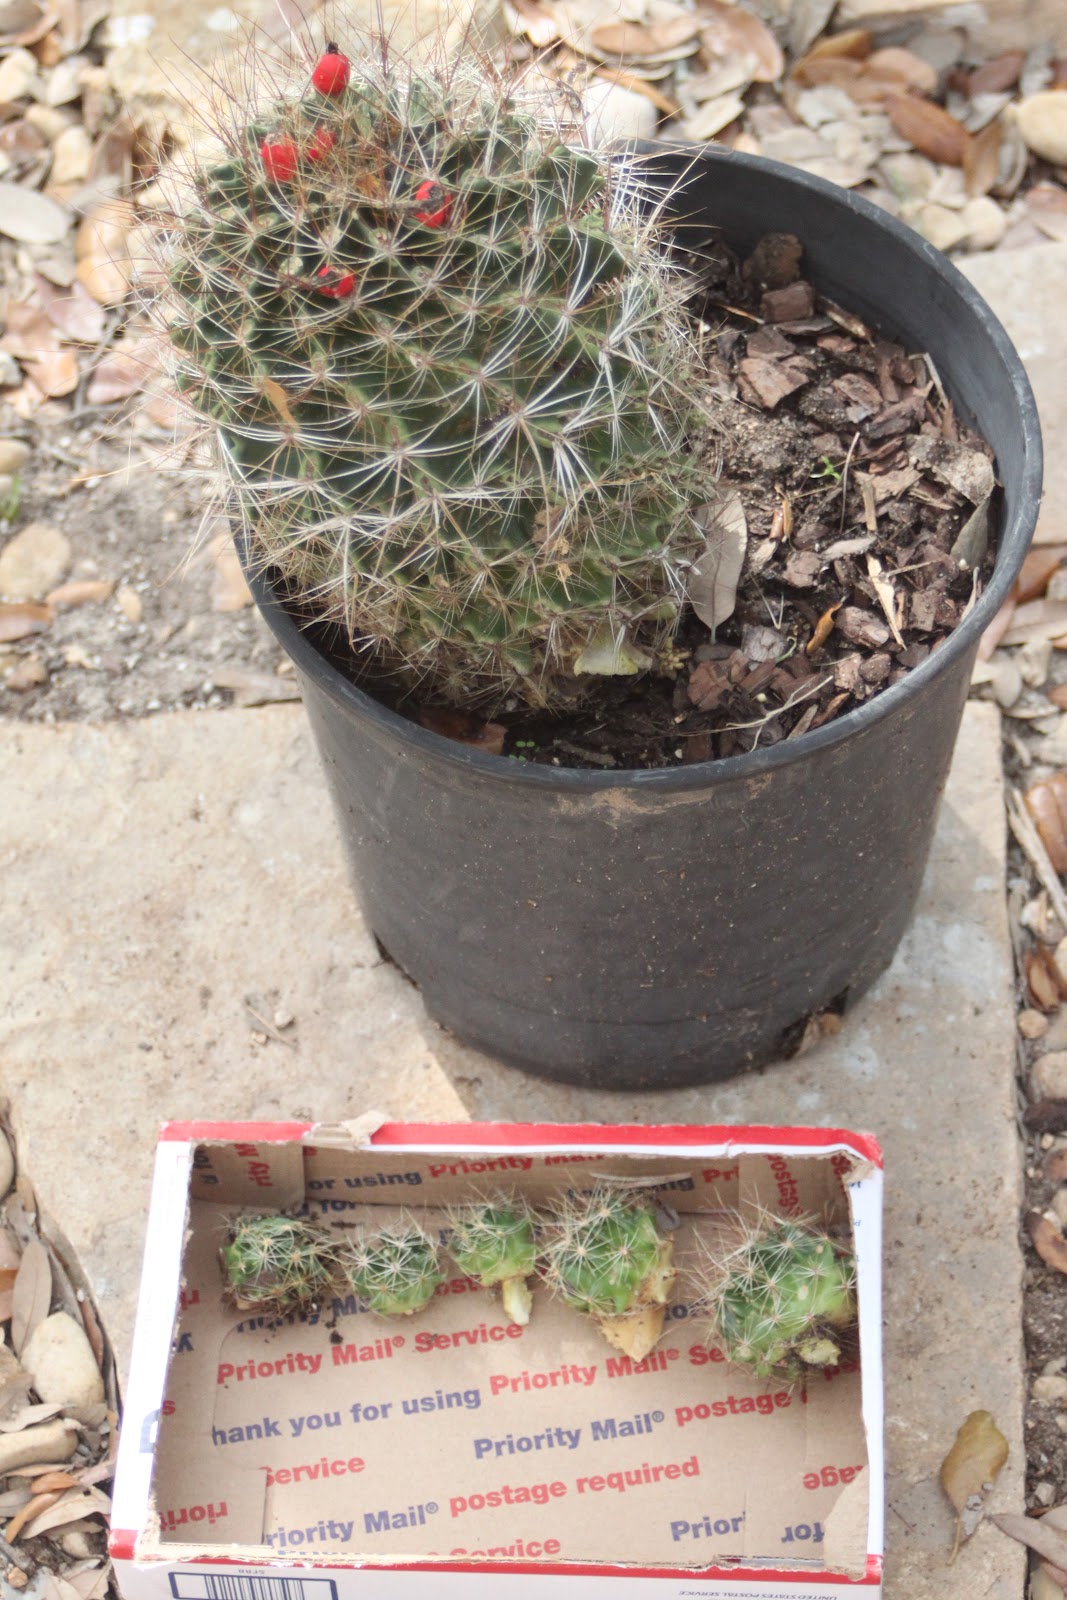
Here are four of the pups ready to go on their own now, one more to go!

After the surgery we put the five pups in a box and stored them in the garage for about a week to callous over. If planted immediately the pups could rot, so they must heal first. We also stored the mama plant in a dry spot so its scars can heal. Do not water the plant or pups at this point to avoid any rot that might occur.
Fast forward one week later and the pups are ready to pot up. We are using a coarse sand over light potting mix for this phase. The key is to ensure fast drainage and only allow minimal contact with water to avoid rot at this stage.

Just use the tongs to place them in pre-watered damp sand. Don't water again for week or so, and then water once a week.

About five weeks later, here's what we have. Nice strong roots! The roots were even bigger than we expected. Note that this one was only pulled from its sand to show to you -- plant them with their sand. It will shift a bit, which is not a problem.

We planted them out in the new cactus patch along the dry creek. In their new home they are small and barely visible. We gave these plants plenty of room considering their size at maturity. We'd rather wait for cactus to grow into their space than move them later!

Next in this series I will show cactus pad propagation. I'll also continue to report on progress in the cactus garden.
I love the tool image, you guys were prepared!
ReplyDeleteYes, and it turned out only the tongs were needed!
Delete"Jean the Cactus Guy"...that's the cactus trader / seller I was thinking of on facebook. You prob. mentioned him there, but I forgot the name.
ReplyDeleteGood synopsis, and glad you got Mr. Rock-Oak-Deer to demonstrate. Perfect on planning for mature size...can't wait to see this fill in.
Out here in the desert, we also try to match the original solar / N-S orientation of succulents (maybe a nick on the container, or a mental note). Those are some nice roots...crucial...lack thereof is why >50% of our ocotillos, many yuccas, etc. do not transplant and re-establish.
Your posts on planning for mature size hit home. Cacti are not like perennials or annuals, we really don't want to wade in there and pull something out!
DeleteMaybe the solar orientation changing is why these are spiraling and I can't find a match in my search.
Good information. I like the idea of the plastic pot to hold on. Anything to keep those spines out of your skin.
ReplyDeleteYes, whatever works. The pot fit this task perfectly.
DeleteEnjoyed your instructions.
ReplyDeleteThanks greggo!
DeleteReally nice step by step instructions for people interesting in cacti. I'd like to add....it's also the cheapest way to make your cacti garden happen. A lot of us get together in Tucson and exchange our cacti bits. With a little patience, you'll have the most perfect cacti garden ever....with little money spent:)
ReplyDeleteSwaps are one of my favorite ways to grow the collection and it helps save the budget for special purchases like the orange tree.
DeleteI've been eyeing some cacti around here, and really want to get a nice patch going. Did you use the same kind of sand/potting mix combo for the garden?
ReplyDeleteThose are great instructions, thanks for sharing!
These are mostly native cacti so after they grow out of the rooting mix they are on their own in the native soil. We do break up the rocks there for a nice size growing spot to give them a good start but no special mix.
DeleteBy purchasing from Jean's yard this spring we know our selections will survive our weather here. One neighbor lost a beautiful collection of non-native desert cactus to two years of deep freeze winters.
Thanks for sharing your know-how. My barrel cactus have never pupped but I have lots of others that have. get to it Rock Rose!
ReplyDeleteGlad to help you out for once!
DeleteI always find your advice and info so helpful.
Very good cacti potting instructions. Your second photo reminded me of the dentists with all the tools laid out, and then the other photos were just like having a tooth extracted. I went to the dentist earlier this week, it's obviously had a lasting effect on me.
ReplyDeleteYes, it reminded me of that too. Perhaps because I have an appointment on Tuesday.
DeleteIt is just like a surgical procedure! Great step by step explanation. I can understand perfectly why you would plant them with the view of never having to move them again!
ReplyDeleteThey are interesting and fun to look at, but minimal handling is advised.
DeleteI REALLY enjoyed this post Shirley, thank you for the very detailed lesson. I am going to bookmark this one for later use for sure.
ReplyDeleteI told ya I love this post. I got some pads of a fallen spineless prickly pear after the rains the other day...will this method you used on the barrel cactus translate? Thanks in advance Shirley!
ReplyDeleteThank you for a great step by step instructions.. I also love cactus especially when they are planted on a dish..
ReplyDeleteTree Nursery
My Big Barrel Cactus (It is 18" wide) has about 6 pups all on the south side. Two of the pups are also getting big (about 4" wide) I have never tried to propagate them BUT I am going to try now that I have seen your post. Thank you! You gave me confidence!
DeleteHi, luved the article, normally dnt comment yet felt, u need to knw this, u can also use cut 2 liter soda bottles, to handle cactus they are a thicker plastic and can b cut to watever size u need... As well as can b cut into a scope,like shape, which also works, well and can help,depending on the job... Not forgetting, good old trusty, fork, bothing eating and craving...
ReplyDeleteWell enjoy...
Thank you, these ideas are quite helpful to deal with those cactus spines.
DeleteI just bought a small cactus with a bunch of pups ... Does it matter when i separate them? They are very small right now. Can I separate them now or should I wait until they are a little bigger? New to this so appreciate any advice regarding timing.
ReplyDeleteThe first few photos in this post show they can be quite small for removal from the main plant. The key is to let them dry a bit and give them sand for a good root start.
Delete