
Building it became a necessity to hold a growing collection of garden stuff, but it also needed to have some Texas style and mimic the "shed style" of our house. The plans were inspired by old wooden buildings still in use around our area and the look is simple and functional. Once I found my inspiration, it was easy to come up with a plan we could build ourselves.
The City of San Antonio does not require permits for sheds under 120 square feet so the size limit was a given. But instead of a typical 10'x12' footprint to meet the requirement, I made the building 8' deep and 12' wide to reduce wasted floor space in the center and use standard sized materials more efficiently.

There are no windows on the sides because they take away a lot of storage. In that way this shed is more functional than decorative. I may add faux windows using framed mirrors at some point.
The city code does not put a height limit on this type of shed so we went with 12' in the front which allowed for a clerestory window above the door to light the interior. The height also made a porch cover possible. So the 12' height provides a good mix of proportion and function. Running electrical lines way out there would have required a lot of digging (must be 18" deep and inside conduit pipe) and also required a permit, something we were trying to avoid, so it was not added.
Siting the shed was easy; we placed it in the back corner since the spot was somewhat level and out of the way. (And yes, we also replaced the ugly fence.)

Once the materials were in place, the work began with the base, where proper leveling is key to a good building. This took a lot of effort, but was worth it. Note that the treated cross-timbers do not contact the ground.

Anchoring posts in the corners for wind bracing, and stones to prevent critters from making a home under the shed.

3/4" interlocking MDF for the floor. Note how the 8x12 dimensions fit the materials without splicing or cutting and also reduce waste.

Then the frame went up. Roof slope is approximately 18" front to rear since metal roofing will be used. Double bracing at the door adds strength.

The siding added and it's beginning to look like a shed. While I would have loved a natural wood shed, we used hardiboard siding with cedar trim to limit maintenance. We do plan to add vertical battens for more of an old building look.

Metal roof for low maintenance. A few months later we put a metal roof on the house, so now they match.

With the main building finished it was time for the porch to go on. Cedar 4x4 posts and cedar joists provide for a rustic Texas look.
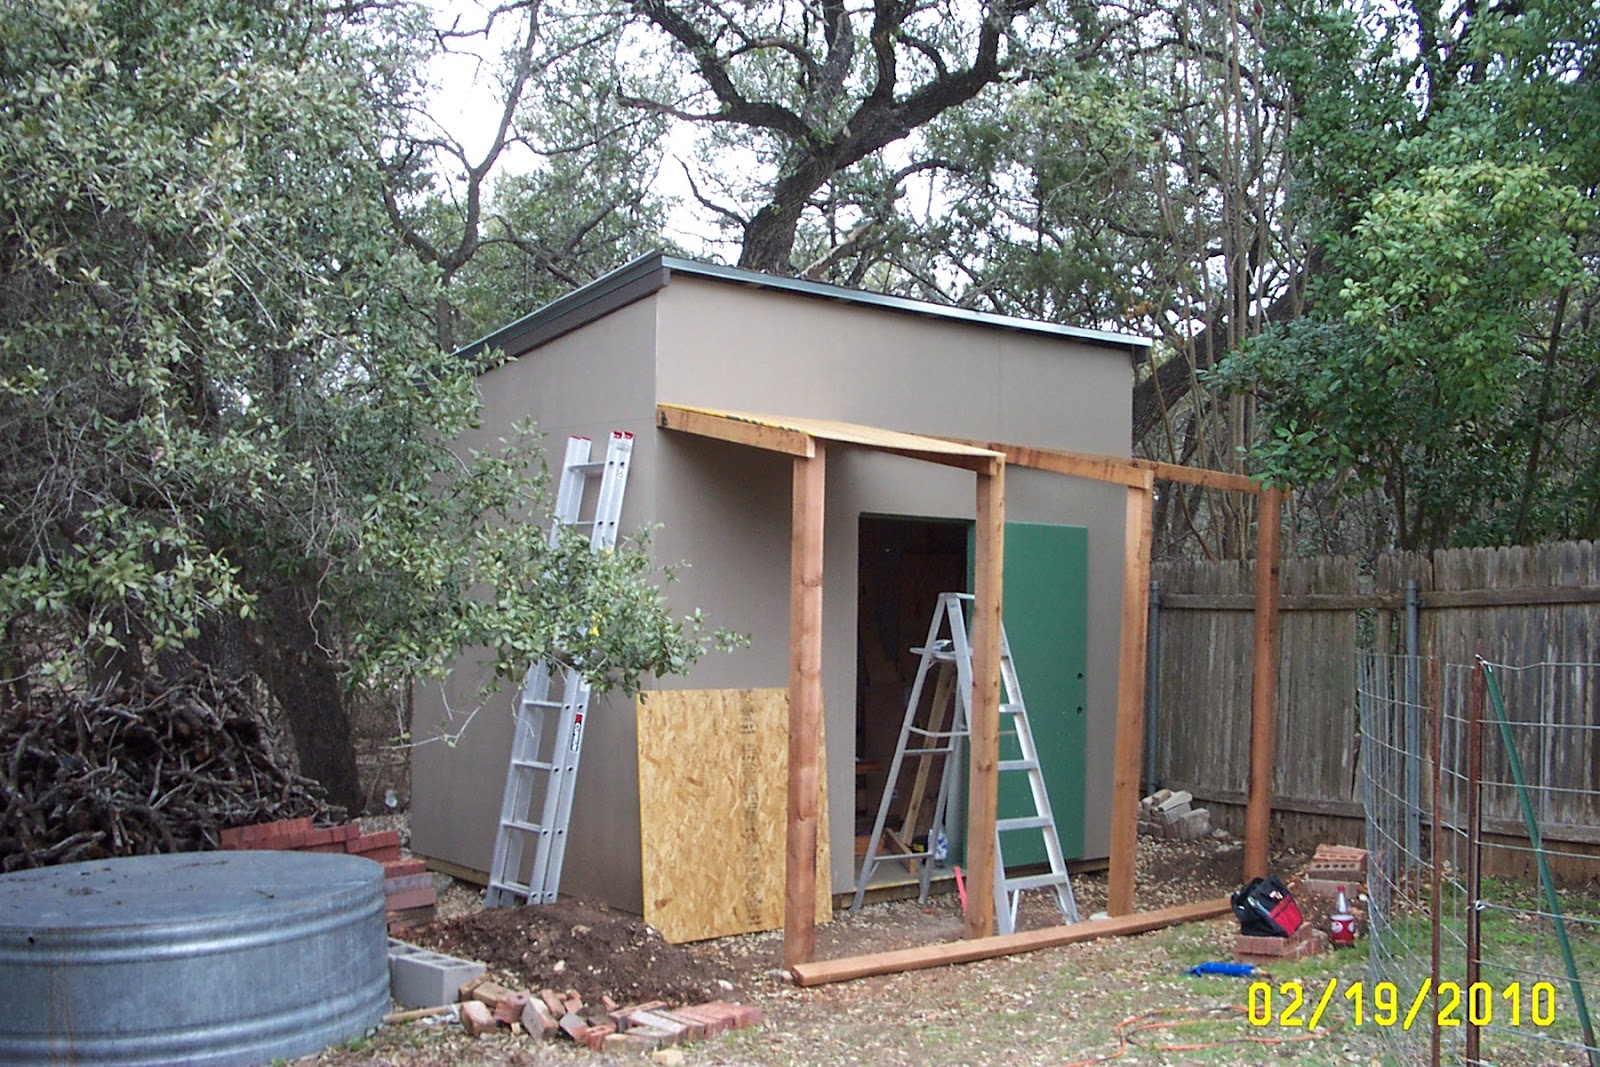
This porch turns a boring, boxy shed into an interesting feature in the yard. The window was found on Craigslist super cheap and the steel door was free on Craigslist. The porch floor bricks were free from our neighbor, a landscaping contractor. The square spaces in the bricks are for mosaic inserts I plan to add in the future. All the wood trim is cedar.

It's been in use for about two years now. Although the shed is primarily functional we did spruce it up a bit by using an old shelf and a table rescued from the neighborhood curb trash as storage for pots. A garden themed wreath made from thrift shop items dresses up the windowless steel door. The bulb planter to the left of the door belonged to my grandparents (non-functional in our caliche soil).

Although many sheds rot out within 15 years, this shed will last for decades because we used the proper materials and building techniques.
Now that the new garage is finished the shed will be used for my garden projects. A potting bench with sink will be added along the left side where the garden is now. We kept the old deep cast iron double sink removed from our kitchen when we remodeled so all I need now is cooler weather and time for more projects.
I'm so jealous. I miss my garden shed, in our old garden. Here, we have to jump through too many hoops, to build one. And, I don't know where I'd put it.
ReplyDeleteThis looks good. I think sheds add a wonderful touch to a garden...along with being great storage.
Have a great weekend. Hope they're right about the rain.
Thanks Linda, I hope you get some rain too.
DeleteYour shed is great. I can just imagine the potting bench and sink. I'm jealous. Ours is old, leaky and not animal proof.
ReplyDeleteYour comment definitely reminds me why we needed to use updated materials to maximize the life of the shed.
DeleteTo check out my ideas, go to my Pinterest board on potting benches. You can click the link on the sidebar here.
Thanks for all the detail of how you constructed your shed. It was much more cost effective not pouring a slab. How nice that you'll have a potting bench and especially a sink!
ReplyDeleteCost was a big reason not to go with a slab and the additional prep work to the site was another.
DeleteGreat Job Shirley ! So Functional and very clean lines.
ReplyDeleteThank you, Mario!
DeleteVery interesting post, well done on a great looking shed. LT
ReplyDeleteThat is such a fabulous looking shed! What a brilliant job you did. I can understand perfectly why you would probably be excited over the idea of adding the potting bench and sink on the side!
ReplyDeleteAlmost looks like a new England salt box. Nice post. My computer crashed so all I have is a phone to comment with. Hope you are staying cool.
ReplyDeletePerfect look for the brisket belt meets tamales belt area you are in. Sounds well-built, too, for those of us who need some guidance in those areas - not that there is 1 foot of room here.
ReplyDeleteGreggo thinks it looks New England salt box. It reminded me (before I could see the slanted roof) of a false-front Western building -- like my old Green Hall shed! http://www.penick.net/digging/?p=411 I love your design, and it does look like you built it to last.
ReplyDeletePam, The Green Hall shed is awesome. I enjoyed the story of it.
DeleteThe false front western building was an inspiration, but I needed to get light in and so this version was used. It also allows for more storage space.
Great shed Shirley! I would love one of those....I will add it to my ever growing list! I had a cactus bloom today thanks to you - check out my post today when you have a minute. And thank you! http://xericstyle.wordpress.com/2012/07/08/future-garden-giants-are-happy/
ReplyDeleteWow, Heather that's a good job on the cactus.
DeleteJust about every gardener's dream: a shed of one's own. You make it sound accessible. So smart to plan around the dimensions of the materials.
ReplyDeleteI like the artsy punch it gives that corner. Adds personality to the space. Nice!
ReplyDelete