
A year ago we started with this

In January 2011 we began a long-planned project to construct a garage/workshop in an underutilized side yard. In celebration of the first anniversary of completing the project I'm sharing some of the planning and construction process.
The original driveway ended at the double gate and the yard beyond was an eyesore. Here's a view of the area from the roof of the house.

In addition to the functional requirements, a top priority was that the new construction should look like the house which is "Shed" style. We based the plans on the New England saltbox because it provided flexible space and similar lines to the house. We also decided to go with a wide one-car garage instead of a full two-car in order to leave some gardening space between the house and garage.
While most projects around here are DIY, a new garage is not something we would construct by ourselves. We both have extensive experience in construction and project management so we acted as our own contractor on the project and subbed everything else out.
After developing our plans we hired an engineer to design the foundation as required by the city. Once the engineering drawings were approved and the permits acquired, we were ready to go. The foundation contractor dropped off really cool equipment the first day.

I watched the work from an upstairs window, best to stay safe when these guys are moving this equipment around

The crew unearthed this huge stone which they moved into place for us to use as a bench facing the creek. It's roughly 4'x3' and we estimate it weighs at least 400 lbs. We had about five minutes to decide and no changing our minds now. The rock bench will be incorporated into a low wall and garden under the trees. In the background you can see where some of that top soil ended up and the beginnings of a new garden between the house and garage.

After the forms were prepared, we had big cement trucks in the driveway too. We did have to trim a few secondary tree limbs from the beautiful live oak to the right, fortunately the largest limb across the drive remained untouched.

It rained for the first time in months

Rain is good for cement, it cures slowly and results in a stronger slab

It was a big day when the frame began to go up

Finally the roof went up, the attic is large enough for lots of storage and we ran water lines if someone wants to convert it to living space in the future.

A view from the side, the building steps down the hill with the workshop on the the back separate from the garage. The space on the second level can be used as a studio when I have messy projects.

It really started to look like a building once the sides were enclosed and the roof is decked

Standing seam roof to match the house

Wrapped and ready for the stone exterior, we had a rare snow delay.
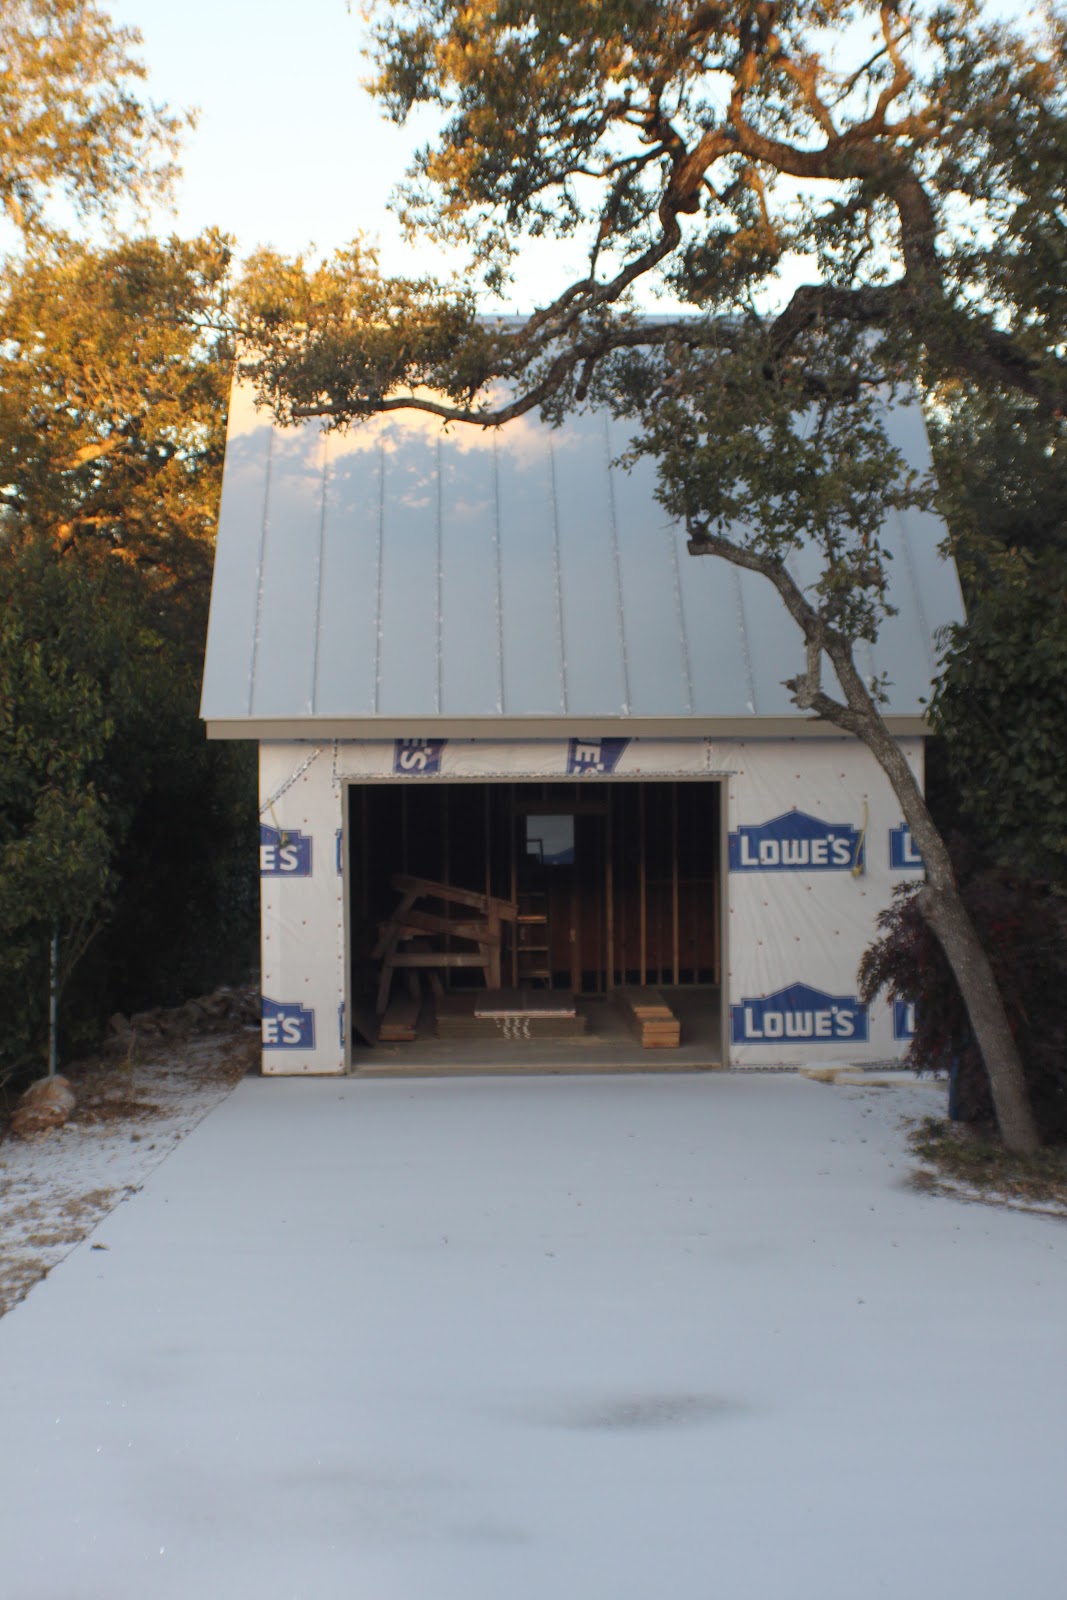
It was cold too, the temperature stayed below freezing for three days. The construction crews I worked with in Boston would have thought this was great weather to work in, here in San Antonio they took a few days off.

After the snow melted and the weather warmed up we were ready to get back on track.
Stay tuned for Part Two - The Stone Masons
Nice job keeping a photo journal of this project. It looks really nice. I have the same issue. There are several areas that aren't any good for garden space and require a structure. It'll make for fun planning later on....how for the now, the space is just an eyesore. You guys did a wonderful job planning this one out.
ReplyDeleteThank you Chris! A functional structure can add so much to a garden if it's thought out.
DeleteVery nice progression, not to mention it does work visually. I figured it was part of the original home construction from your other shots...and those live oaks:-)
ReplyDeleteThanks DD, the goal was to make it look like it has always been there so I really appreciate your noticing that.
DeleteThe oaks were part of the planning, literally figured in the height of the cement truck during the bidding process.
That's as big as my house. lol.
ReplyDeleteThis is Texas greggo!
DeleteWow a project that requires machinery like that is a MAJOR project, nice job!
ReplyDeleteWe had fun, thanks!
DeleteYou did a great job. Like DD, I thought it was part of the original construction.
ReplyDeleteThank you, that's the best compliment.
DeleteOh! I love these pictures! What a huge job! I’m so looking forward to your next post!
ReplyDeleteThanks, the crews did most of the work though.
DeleteVery nice solution. What a difference between the before and the after. It looks just perfect!
ReplyDeleteThank you Holley!
DeleteHaving just framed a new barn with a concrete floor this month, I know how much work a project like this is! You've done a beautiful job. I love how it turned out with the stone facade, and standing seam roof, it's gorgeous!
ReplyDeleteThank you Clare!
DeleteYour new goat shed looks great, I'm impressed with the work you are doing there.